
How To Make A Unit - Part 1
Light And Switch

Introduction
This tutorial will guide you through the basics of creating a unit. We will be creating a simple unit with a switch which controls a light.
The unit will be set up to run a Typescript runtime "Deno" as the external process. This tutorial assumes that you are already familiar with the Typescript programming language, though don't worry if you are not; all code is provided for you and should be easy to follow.
Before We Get Started
Here's what you'll need to follow along
Alchemy
Deno
Typescript-Deno API Pack
You will ofcourse need a copy of Alchemy. This tutorial was created using version 0.2.3
The external process that will be run. This tutorial was written using version 1.43.3
Deno can either be installed as a command line tool, or downloaded as a stand-alone program. Instructions for installation can be found on the official Deno website, and you can find the stand-alone program files on the project's github releases page. This tutorial will use the second method by downloading the runtime and running it directly.
To make development easier, we will be using the "typescript-deno" API pack, which you can find on the packs page. This tutorial was written using version 0.1.0
Note
Though the specific versions of the programs and packs are listed, it is not strictly necessary to get these particular versions.
One More Thing
There are Units and there are Groups. Units are placed within groups, which themselves can be placed within other groups. In this way we can lay out collections of units and divide them up by purpose or whatever we like.
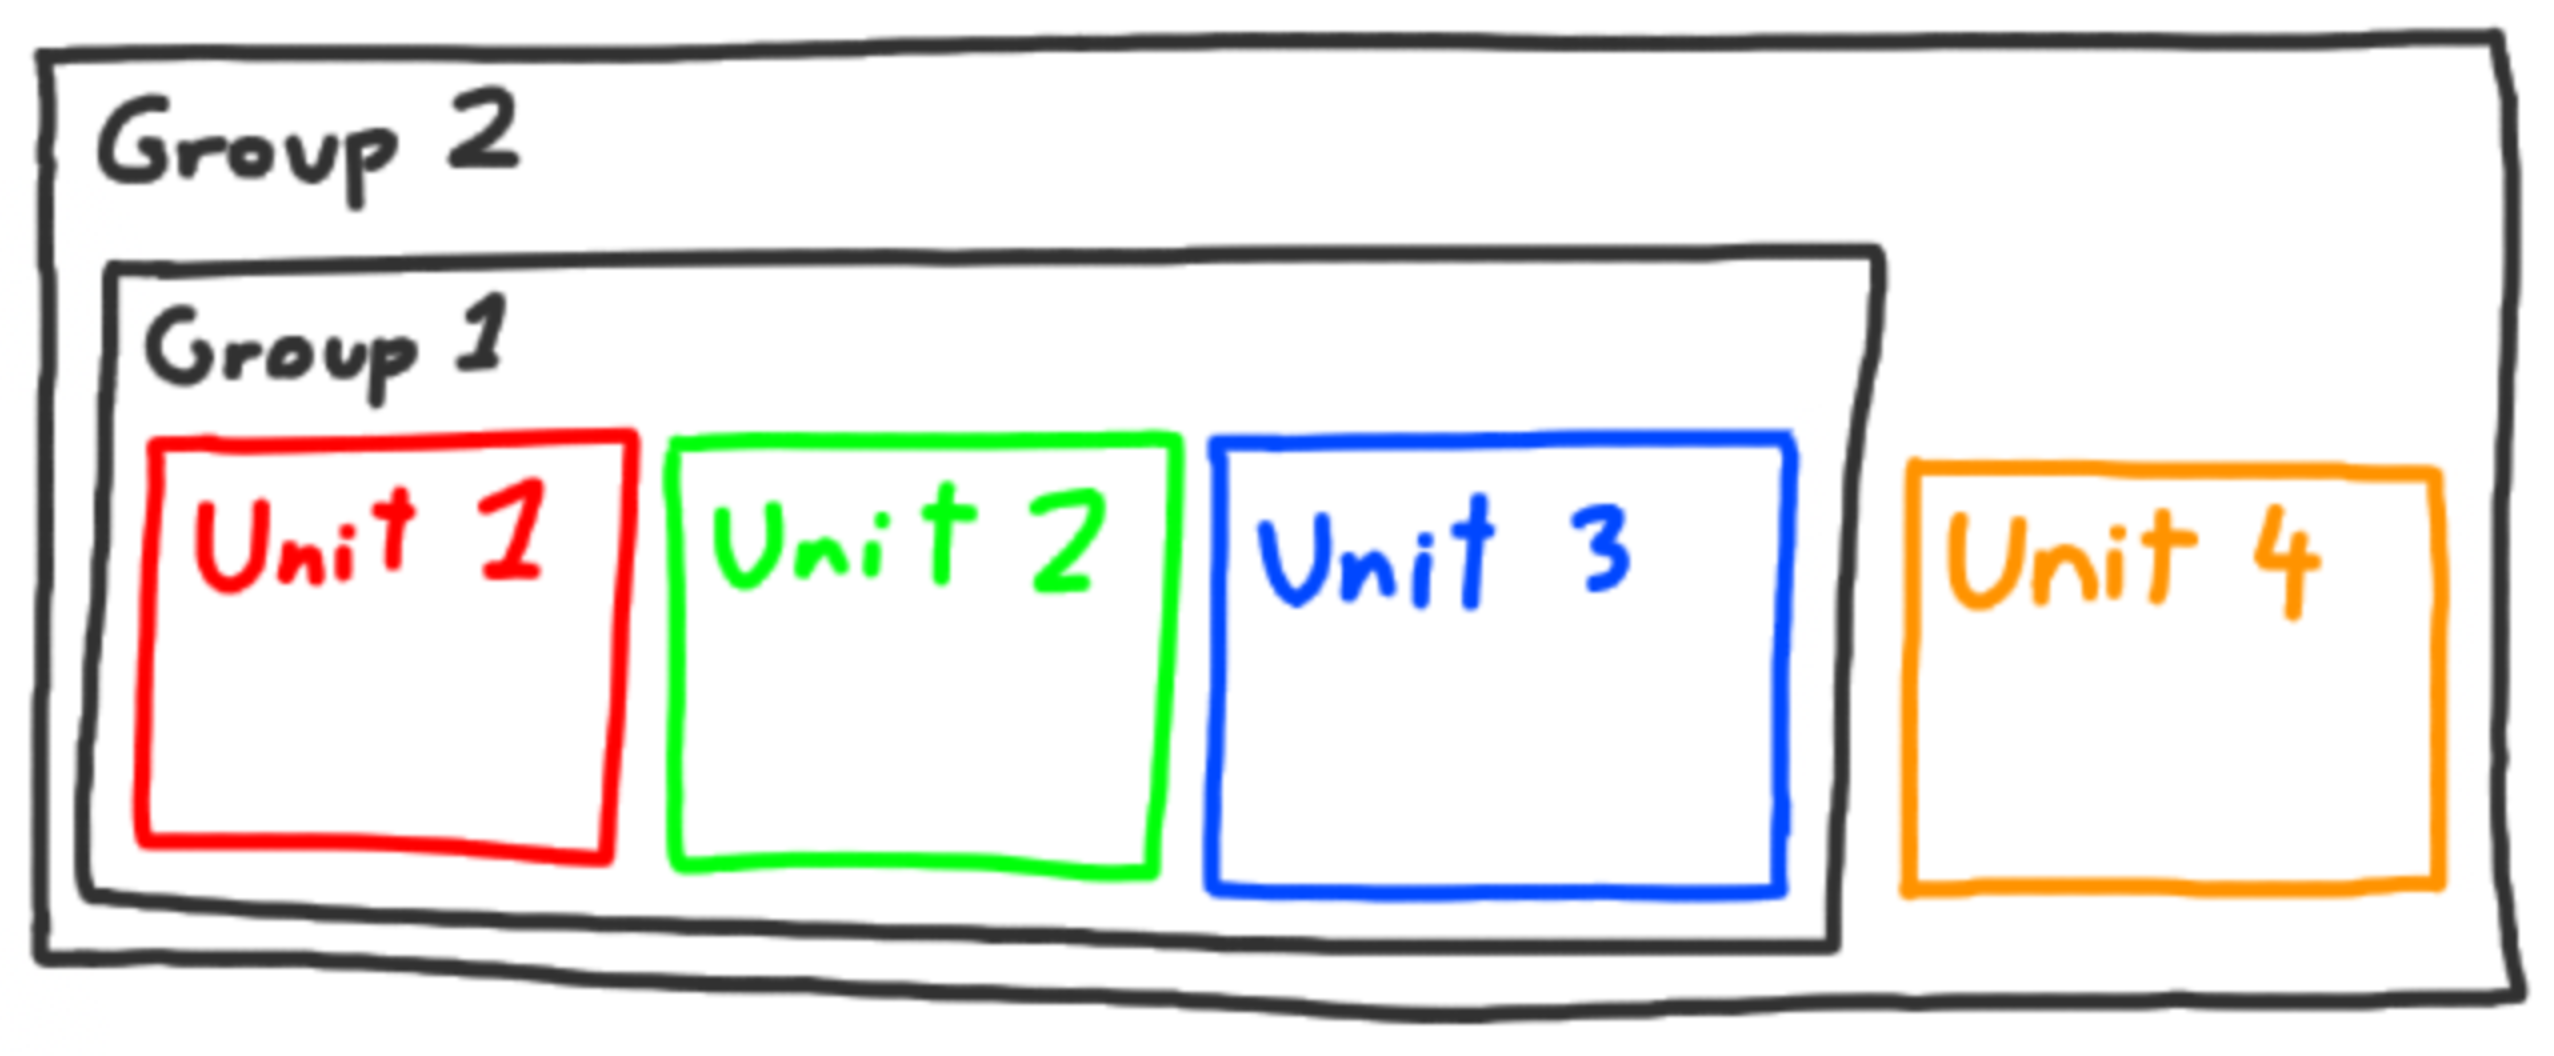
This grouping is done with directories, with each directory containing a special "index" file containing information about the group or unit.
group-2
├─ index.group
├─ group-1
│ ├─ index.group
│ ├─ unit-1
│ │ └─ index.unit
│ ├─ unit-2
│ │ └─ index.unit
│ └─ unit-3
│ └─ index.unit
└─ unit-4
└─ index.unit
Click here for a in-depth description of the Group Description File
Click here for a in-depth description of the Unit Description File
This whole tutorial covers the creation of these files.
Lets start!
Unit Project Directory
First, we need to create the project directory. This can be done wherever you like, but lets keep things simple and do it on the desktop. Just create a folder on your desktop called "tutorial".
Next, we need to add the group description. Create a file within "tutorial" called "index.group", then paste in the following text.
0
1
2
{"printName": "LightAndSwitch",
}
The "printName" is the text that will be visible to the user in Alchemy's menubar for this group.
There are more details you can add here, but lets keep it simple for now and leave it at that. You can check out all the possible configurable items for a group here.
Set Alchemy Config
In order for this group to appear in Alchemy, we need to tell Alchemy where to find it. This is done using the configuration file.
Open Alchemy and click "file > settings". This will open a text editor. We need to modify the "external_unit_directories" entry to include the address of our newly created group.
Here's an example of what the configuration could look like after your changes.
0
1
2
3
4
{"external_unit_directories": [
"/path/to/your/Desktop/tutorial"
]
}
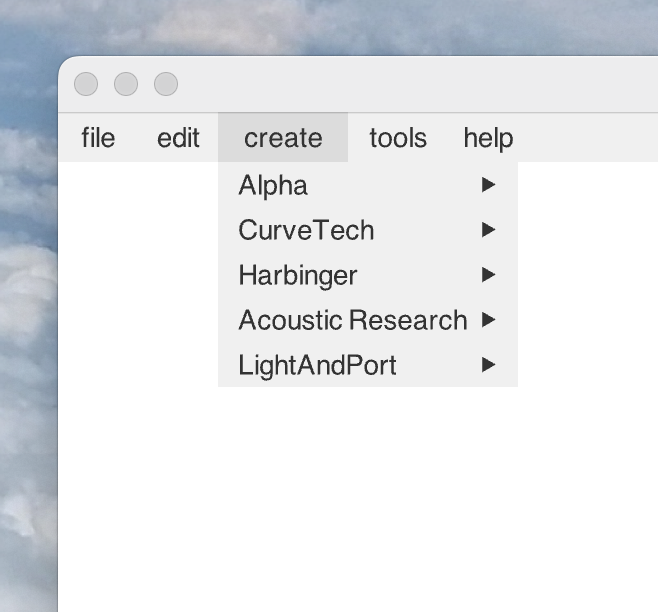
Restart Alchemy and you will see the new option added to the Create menu.
Create The Unit
Now that we have the group in place, lets add the unit. Within your project add a directory called "light_and_switch". Next, inside this new directory, we add the description file itself. Create a file called "index.unit" and paste in the following text.
0
1
2
3
4
5
6
7
8
9
10
11
12
13
14
15
16
17
18
19
20
21
22
23
24
25
26
27
28
29
30
31
32
33
34
35
36
37
38
39
40
41
42
43
44
45
46
47
48
{"modelName": "light_and_switch",
"printName": "Light & Switch",
"space": [
{"x": 0.0, "y": 0.0}, {"x": 0.0, "y": 50.0}, {"x": 100.0, "y": 50.0}, {"x": 100.0, "y": 0.0}],
"collisionActive": true,
"base": [
{"name": "backing",
"attribute": {"type": "rectangle",
"content": {"width": 100.0,
"height": 50.0,
"colour": {"r": 0.5, "g": 0.5, "b": 1.0}}
}
}
],
"parts": {"front": [
{"name": "light",
"attribute": {"type": "glowboxCircle",
"content": {"x": 25.0,
"y": 25.0,
"radius": 15.0
}
}
},
{"name": "switch",
"attribute": {"type": "checkboxCircle",
"content": {"x": 75.0,
"y": 25.0
}
}
}
]
}
}
Show More
There's a lot going on here, so lets step through it
modelName
The unique id of this unit. It should be the same as the directory name.
printName
The text that will be displayed to the user for this unit.
space
A polygon which
- is used to compute collision with other units
- is the shape of the "stamp" when placing the unit
- defines the "selection space" of the unit (where in the window a user can click to select this unit)
The polygon should match the visible outline of the unit as best as possible.
collisionActive
Whether this unit should collide with others.
The last two sections define the actual look of the unit, and are where you will things like buttons and readout.
base
A list of Parts used as the background of a Unit. Any interaction with a Part placed here will be considered to be an interaction with the body of the Unit itself (selecting the Unit, moving the Unit, etc.) Thus interactable Parts like buttons and dials should not be placed here.
parts
Where all interface parts should be placed. This section is split in two; "back" and "front".
- "Back" Parts are placed behind the "base", and so can be used to hide Parts behind the body of the Unit. This entry is optional and not covered in this tutorial.
- "Front" Parts are placed atop the "base", and will be where the majority of Parts are.
There are more details that can be added here. You can check out all the possible configurable items for a unit here.
Test The Unit
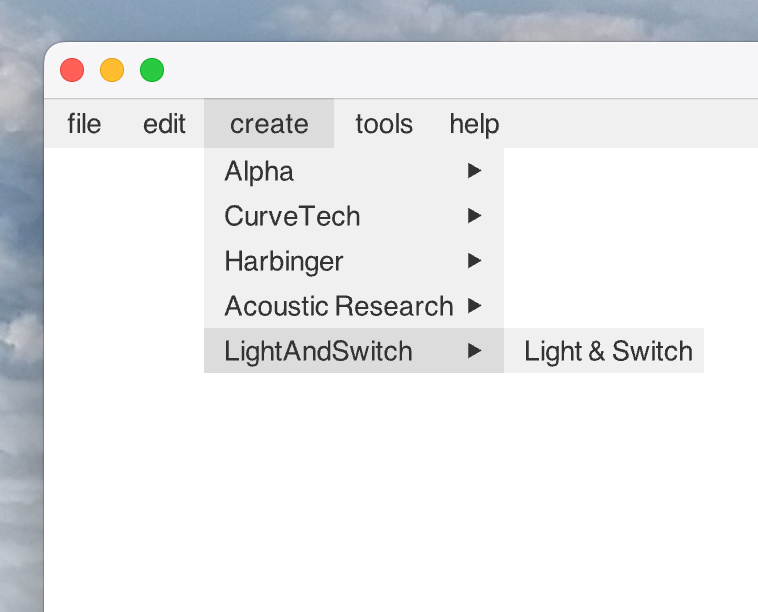
Restart Alchemy once again and you will see the new option added to the Create menu.
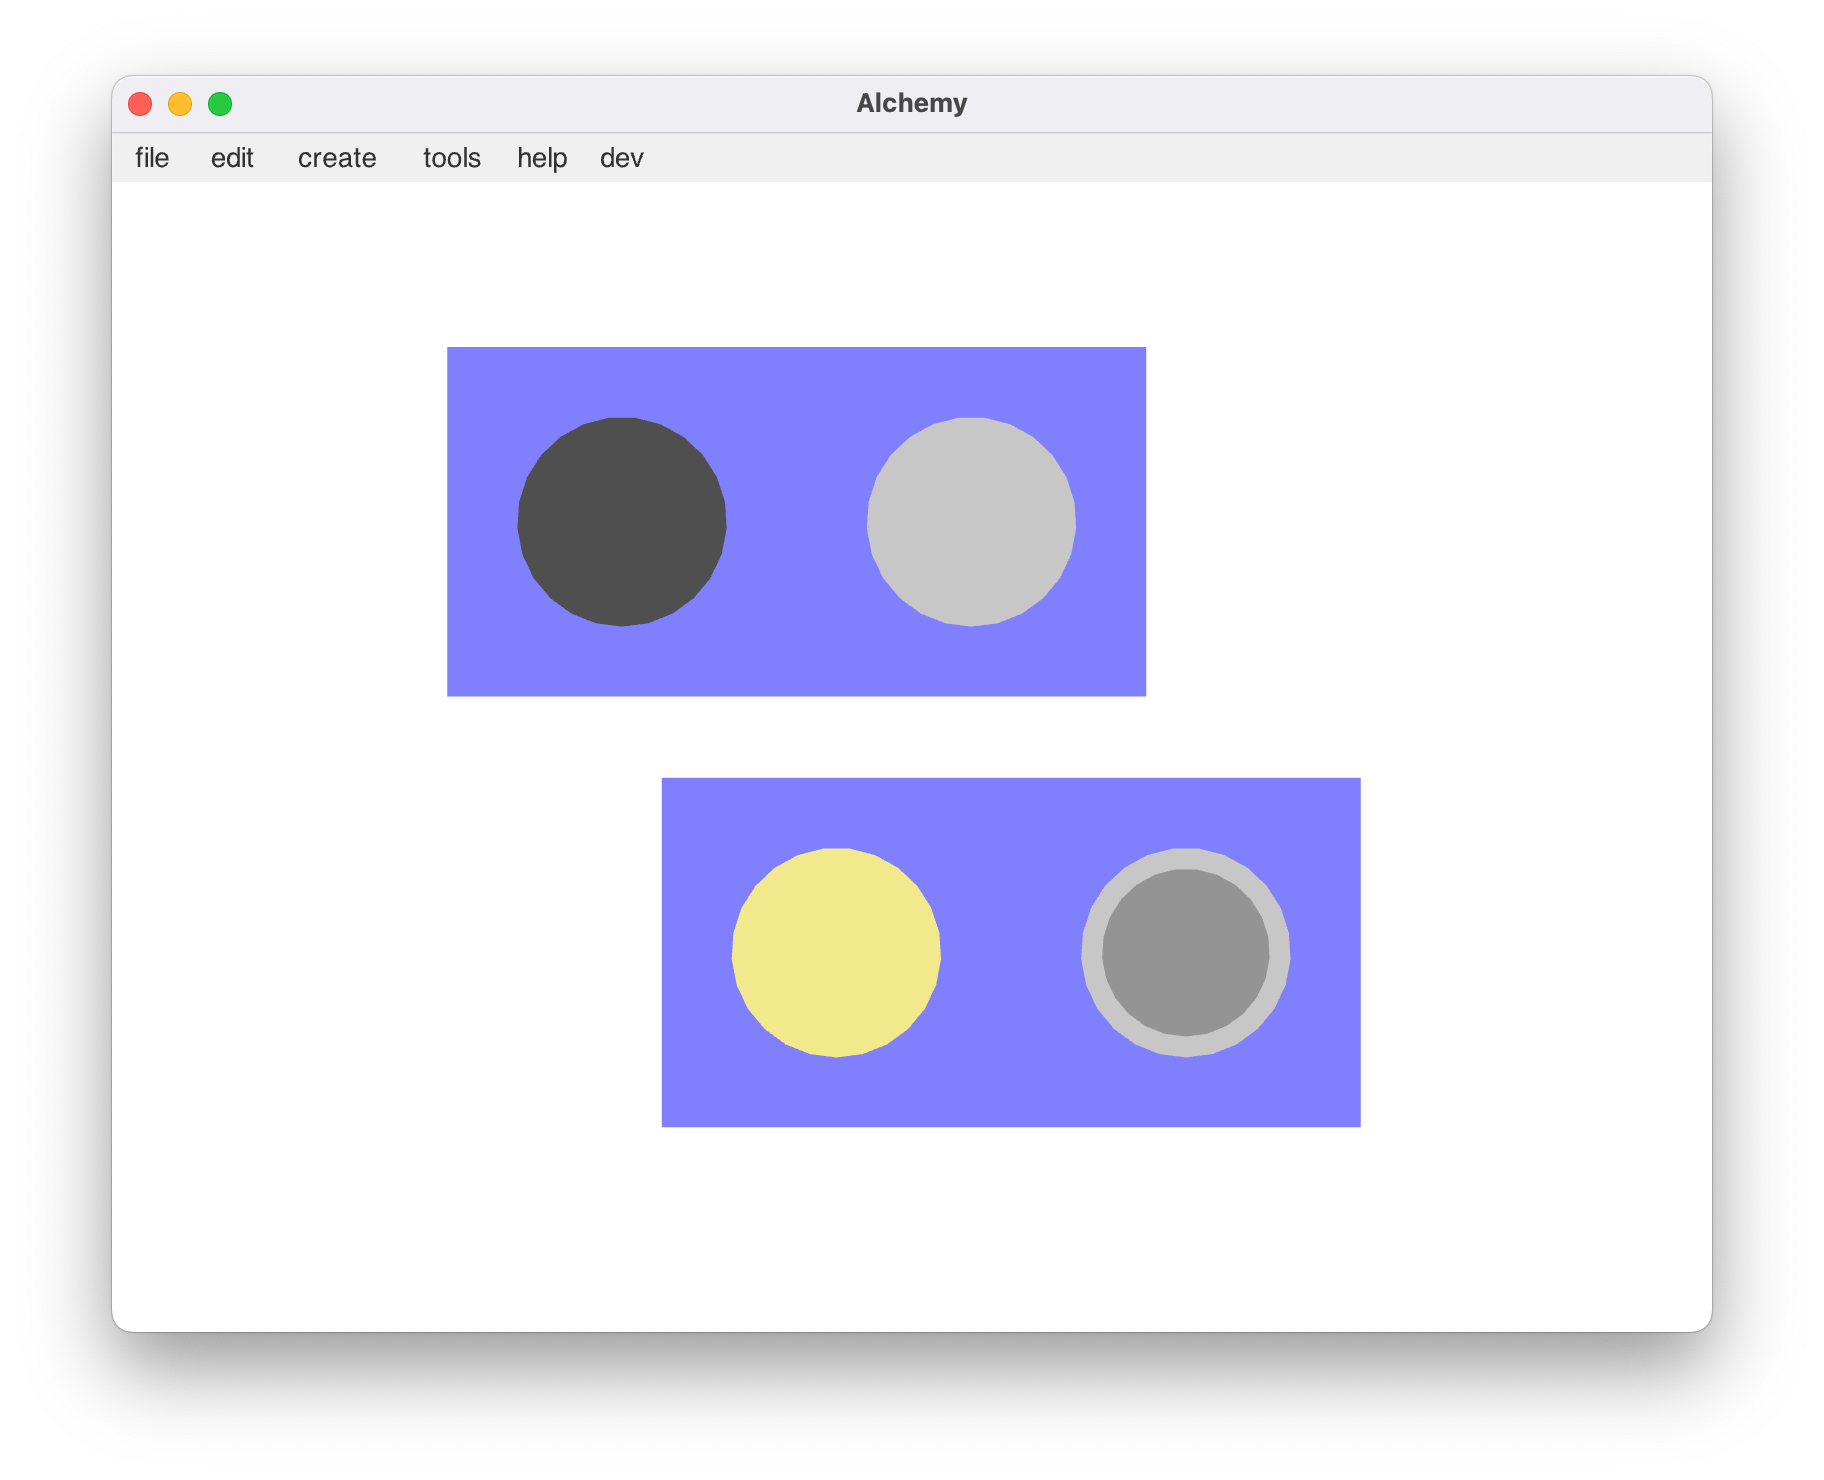
If we select this new Unit and place it, we should see this.
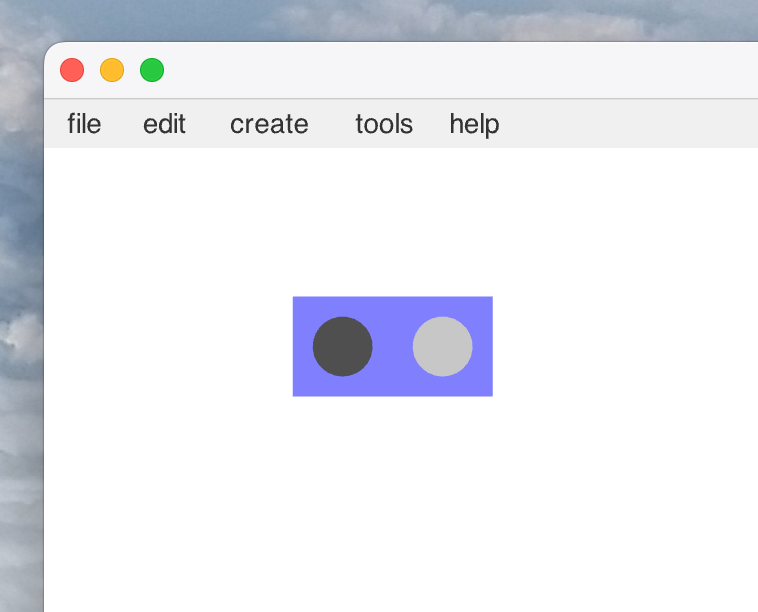
You'll notice that if you click on the checkbox, the checkbox is checked but the light does not glow. For this, we need to add internal logic to the Unit.
The Executable
Firstly, we need to add Deno and the console. I recommend placing these two items in the group directory beside the "light_and_port" directory. This way we can easily reuse them in the following tutorials.
tutorial
├─ deno
├─ light_and_port
│ └─ index.unit
└─ typescript-deno-x.x.x-y.y.y
Next we create the Typescript source file. Place it alongside the "index.unit" file. Lets call it "main.ts".
tutorial
├─ deno
├─ light_and_port
│ ├─ index.unit
│ └─ main.ts
└─ typescript-deno-x.x.x-y.y.y
Within that "main.ts" file, paste the following code.
0
1
2
3
4
5
6
7
8
9
10
import apiConsole from "../typescript-deno-0.3.3-0.1.0/index.ts";
apiConsole.unit.setMouseEventListener(({ event }) => { if(event.type === "checkbox") {apiConsole.interface.glowbox.onOff(
0,
true,
event.content === "checked"
);
}
});
Lets talk about what this code is doing. First - on line 0 - we import the API Console. This code object handles a lot of the work with dealing with Alchemy itself. So instead of having to formulate JSON strings to be sent out; the console presents us with neat methods to use. It also provides us with handles for when messages arrive from Alchemy. Both concepts are used here.
On line 2 we attach the event listener. The unit we're making here is very simple and we only are interested in mouse clicks on the button part, so we set up a listener for these events with the "apiConsole.unit.setMouseEventListener" command. The callback receives a number of arguments but for now we're only interested in the event object itself.
On line 3, we discover if the event is of the correct "type", testing to see if this event is from a "checkbox" part.
Lines 4 to 8 are where we instruct the light to either turn on or off. The light (or "glowbox") is an interface part, so we must go through the "apiConsole.interface.glowbox" object address. The "onOff" method is then used. You'll notice that it takes three arguments. The first two are used to determine what part you want to work with, as there could be many parts on a given unit. The first argument selects the part by index and the second whether it is on the "front" of the unit.
Finally, on line 7 we provide our desired state for the light. For a 'CheckboxEvent' such as this, the event's "content" field will be either "checked" or "unchecked".
Note
Please note the import at the top of the file. If you happen to be using a different version of the Typescript-Deno API pack, you'll need to change the version numbers in this file to match.
Line 2 contains a reference to the event object. We only use one variation of the object here, but a full description of all possibilites can be found here.
Finally, we must modify the "index.unit" file to include the execution instruction
0
1
2
3
4
5
6
7
8
9
10
11
12
13
14
15
16
17
18
19
20
21
22
23
24
25
26
27
28
29
30
31
32
33
34
35
36
37
38
39
40
41
42
43
44
45
46
47
48
49
50
51
52
53
{"modelName": "light_and_switch",
"printName": "Light & Switch",
"space": [
{"x": 0.0, "y": 0.0}, {"x": 0.0, "y": 50.0}, {"x": 100.0, "y": 50.0}, {"x": 100.0, "y": 0.0}],
"collisionActive": true,
"executable": {"mac": "../deno",
"win": "../deno.exe",
"args": ["run", "main.ts"]
},
"base": [
{"name": "backing",
"attribute": {"type": "rectangle",
"content": {"width": 100.0,
"height": 50.0,
"colour": {"r": 0.5, "g": 0.5, "b": 1.0}}
}
}
],
"parts": {"front": [
{"name": "light",
"attribute": {"type": "glowboxCircle",
"content": {"x": 25.0,
"y": 25.0,
"radius": 15.0
}
}
},
{"name": "switch",
"attribute": {"type": "checkboxCircle",
"content": {"x": 75.0,
"y": 25.0
}
}
}
]
}
}
Show More
An in-depth description of the executable entry can be found here, but lets take an overview of what we've done here.
The executable entry has two main sections; the "mac" and "win" addresses, and the "args" array.
mac / win
These are both addresses to executables which will be run when the Unit is created. Which address is used depends on the OS that Alchemy is running on; if MacOS then the "mac" address is used. If Windows, then the "win" address is used. Addresses are relative to the description file, so here we're pointing up at the Deno executable in the directory above.
If you decided to install Deno as a command line tool, these address should be changed to reflect that.
args
This is a list of arguments that will be passed to the executable when it is run. here, we are telling Deno to run the "main.ts" file.
Note
You may need to run Deno yourself first to ensure that it will run on your computer. Some systems have security measures to stop you running programs downloaded from the internet.
Note
You may need to add the argument "--allow-read" to this list if Deno is unable to read files from Typescript-Deno.
Test The Unit
Restart Alchemy and create the unit. This time, when you check the checkbox the light will glow.
If It Doesn't Work
You need to check the console to see what errors are appearing. To do so, run Alchemy from the command line. Deno errors will be printed here, along with Alchemy error and logging information.
Done!
Congratulations! You've created your first unit!
You might have noticed that if you copy-and-paste the unit, it resets the checkbox and light so that they are off on the newly created unit. In the next chapter, we'll look into how to copy across the unit's internal state.